Description
by Friday Gladheart, Originally published in The Practical Witch’s Almanac.
Creating lotions at home is an excellent opportunity to delve into herbs, essential oils, carrier oils, chemistry, and cosmetic formulation. It allows you to choose each ingredient carefully based on availability, potential allergies, cost, and unique healing properties. Moreover, you can infuse your lotion-making process with a touch of magic! Let’s explore the art of crafting lotions step by step.
Lotions are created in distinct phases, similar to following a muffin recipe that combines wet and dry ingredients separately before blending them. These phases add complexity to the lotion-making process, primarily due to the need for precise temperature control. The number of phases in a lotion formula can vary depending on the ingredients, but for this quick lotion, we will focus on two phases.
A lotion is an emulsion that combines oil and water. However, this blend creates an environment susceptible to bacteria, fungi, and yeast growth. Since the lotion recipe we’ll be working with doesn’t contain preservatives, making small batches and using them within two or three weeks is recommended. Alternatively, you can refrigerate the lotion for up to six weeks. Maintaining cleanliness by using clean hands, tools, and containers is crucial to prevent contamination. Furthermore, the oils in the lotion can become rancid when they oxidize, but you can slow down this oxidation process and enjoy some healing benefits by incorporating Vitamin E into your formulas.
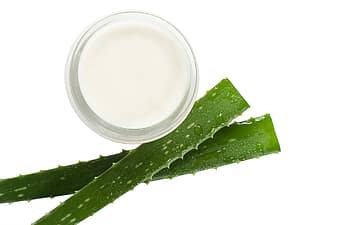
Oil and water naturally separate, like oil and vinegar in salad dressing. To prevent separation, an emulsifier is needed to create a creamy consistency. In salad dressings, the emulsifier is often egg yolk. In lotions, emulsifying wax (a combination of Cetearyl alcohol and polysorbate 60) is commonly used. However, we will rely on gelled aloe vera for our lotion to aid in emulsification.
Ingredients for Phase A
½ cup of Oil
Choose an oil that remains liquid at room temperature. Olive, hemp, jojoba, or rosehip oils work well for dry skin. Almond and apricot oils suit most skin types, while grapeseed oil can benefit oily skin. Creating a blend of different oils totaling ½ cup will result in a more nourishing lotion due to the broader range of fatty acids. You can use oils infused with botanicals for an added touch of magic. For instance, infusing your oil with dried rosemary enhances purification and protection, while adding rose petals enhances love, beauty, and confidence. Allow the dried botanicals to sit in the oil for a few weeks in a dark spot, stirring them daily or every other day. Strain out the herbs before using the oil.
1 ounce of Beeswax
1 teaspoon Vitamin E Oil
Choose a low alpha-tocopherol vitamin E, such as T50 vitamin E. Alternately, you can extract the contents from a few pierced dietary supplement capsules.
14 drops Essential Oil
Choose a skin-safe essential oil like frankincense, patchouli, lemongrass, clary sage, rosemary, or rose. Use half the amount for peppermint or eucalyptus (7 drops).
Ingredient for Phase B
1 cup Aloe Vera Gel
Look for thick, jelly-like gel typically found near sunscreen products in stores. It should contain at least 98% pure aloe vera. Thick gels work better than runny ones, so you can check by tipping the bottle in the store to see if any air bubbles travel through the gel too quickly. Small amounts of glycerin or coloring will not adversely affect your lotion if the gel is 98% aloe vera. Using aloe vera from your plant will not work for this specific formula.
Lotion Procedure
Phase A
Mix ½ cup of oil and beeswax in a large microwave-safe bowl. Heat the mixture in the microwave on high power for one minute, then remove and stir. Repeat this process in 30-second intervals, stirring each time, until all the beeswax has completely melted. Be cautious not to overheat the mixture, as beeswax melts at around 150°F, and it’s best to avoid heating it above 170°F. Allow the mixture to cool to approximately 120°F before adding Vitamin E and essential oils. Stir thoroughly to ensure everything is well blended.
Phase B
While waiting for Phase A to cool, place the bottle of aloe vera gel in a bowl filled with warm tap water (around 100°F). Try to bring both Phase A and Phase B to the same temperature, ideally around 75-80°F. If you don’t have a thermometer, you can gauge the temperature by feeling the containers. Once both phases are slightly warmer than room temperature and have reached a similar temperature, it’s time to blend.
Blending
Use a standard blender or an immersion blender. Begin blending Phase A using the lowest power setting. Gradually add Phase B and continue blending. It is crucial that you add the aloe vera gel slowly to achieve the desired consistency. It should take approximately 5 minutes or more to add the gel. If your lotion reaches the desired consistency before using all the aloe vera gel, you can stop adding more. For best results, use at least half of the aloe vera. Turn off the blender and scrape the sides of the container as needed. Continue to blend until the lotion has thickened, then continue blending for an additional two minutes.
Store your lotion in an airtight jar. Refrigerated lotion will thicken further and have an extended shelf life.